For this step, you need an Apple device or MAC. The first step is you need to open the terminal with the root folder directory (for ex: DemoRevoWoo %). After that, you can follow this step :
- “flutter clean”
- “cd ios”
- “rm Podfile.lock”
- “cd ..”
- “flutter pub get”
- “cd ios”
- “pod install”
- “cd ..”
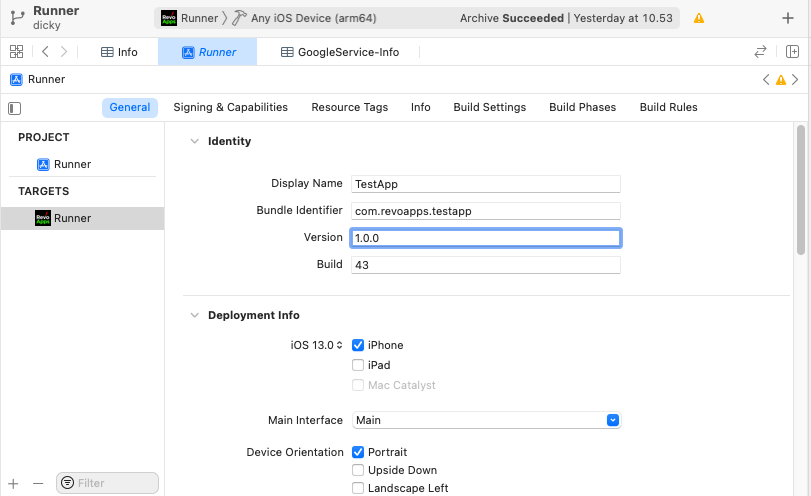
Make sure you follow every step, with the same uppercase, and lowercase letters (no need to insert the double quotes). After that, open the XCode program and fill out the form with your information. You only need to fill out the form in general identity. The display name is the application name, the bundle identifier is the package name that has been changed before, and the version is the number of your version apps (You can fill it like in the picture or you can fill it like in the source code).
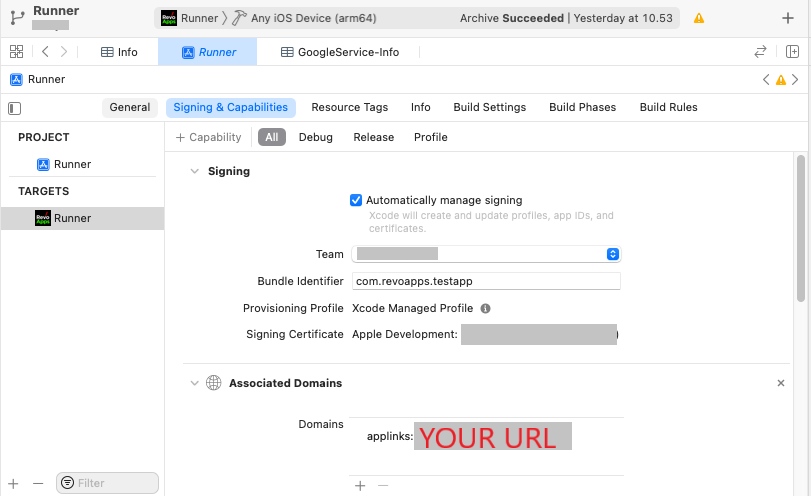
After you fill out the general form, the next is to fill out the “Signing & Capabilities” form. You need to change the team value with your apple account developer. Change the bundle identifier like before and change the domains after “applinks:” word. The domains value is your application url.
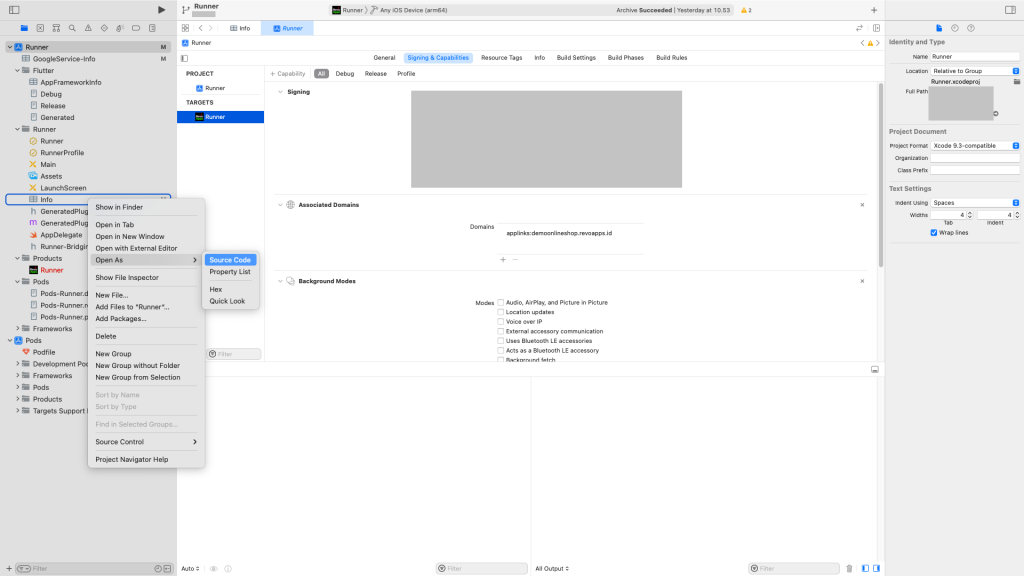
After you finish that, now you need to change the info file and open it as source code.
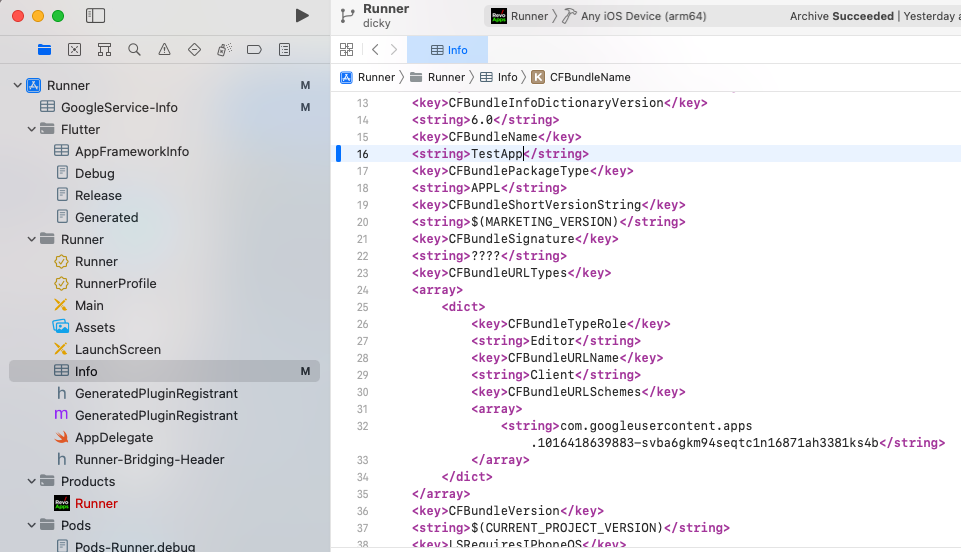
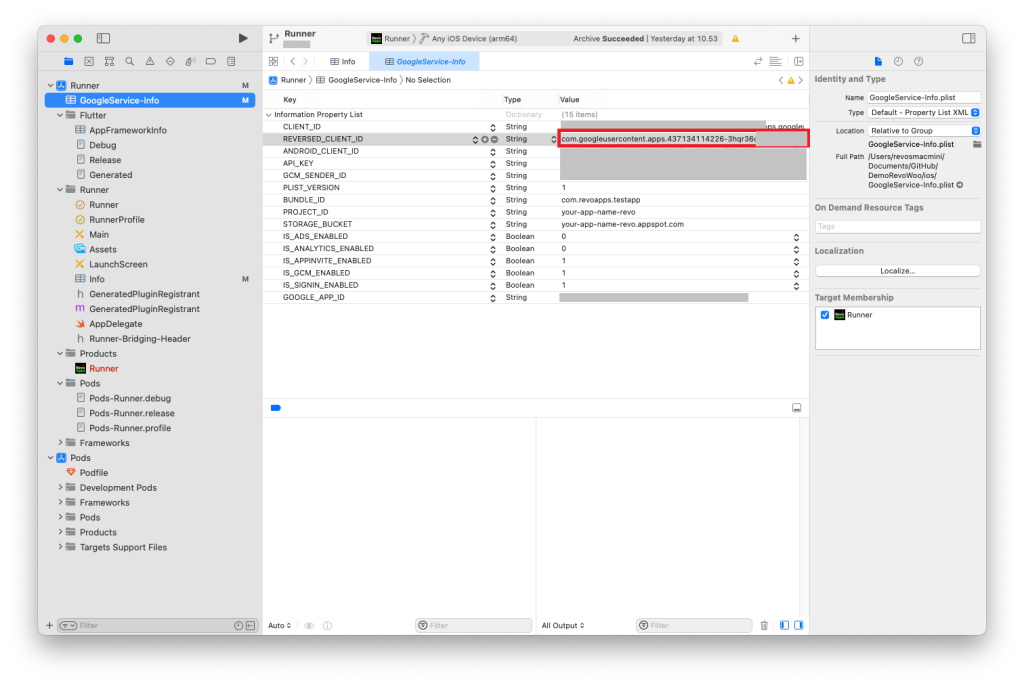
In this file, you need to change “RevoShop” to your apps name (usually at line 16). Besides that, you need to change the value word at line 32 to the value of reversed_client_id in the GoogleService-info file. You can find it on the left bar (usually at the top side and below the runner folder).
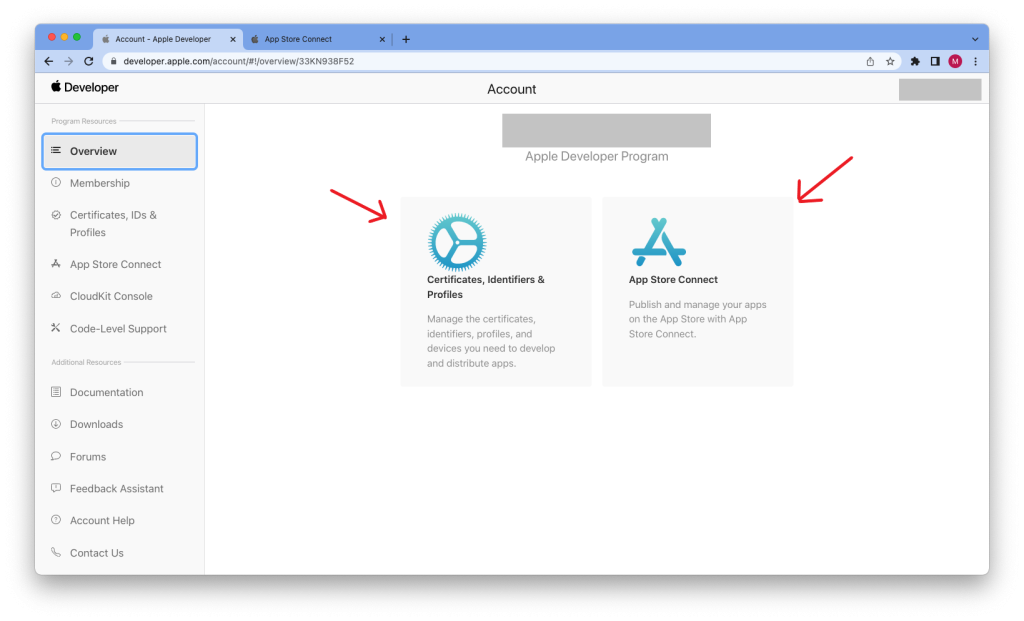
Open the browser for the next step. You need to go to the “developer.apple.com/account” website. After that, you must login with your apple id, which is needed authenticator code. After login, you will be directed to the account developer page. If you don’t have a real apple or ios device, you need to create the device first and choose the Certificates, Identifiers & Profiles. If you have a real apple or ios device, you can choose app store connect.
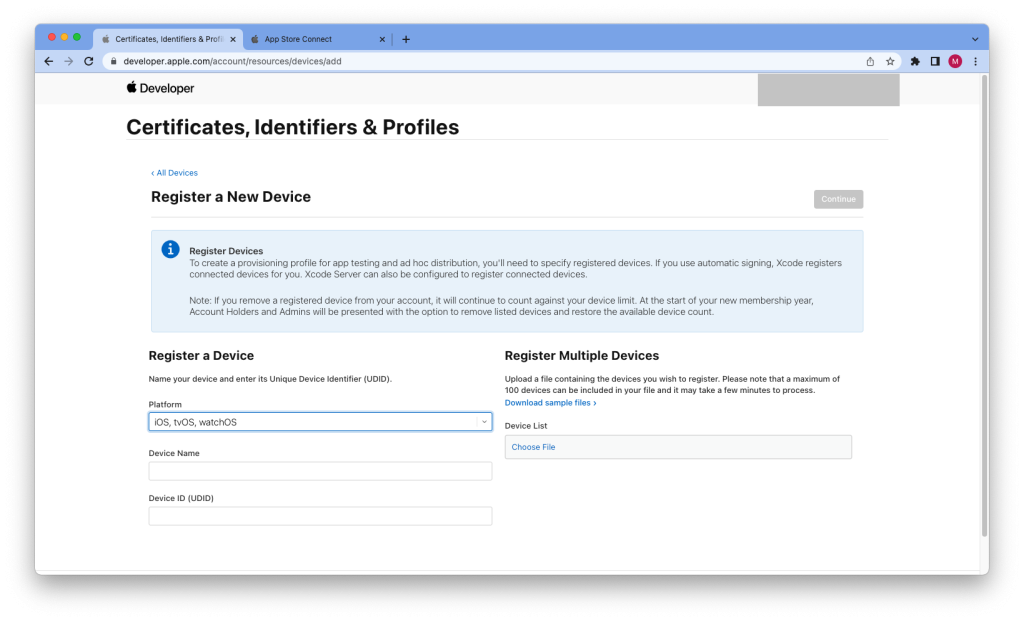
To create the device, you can choose “Devices” menu on the left side and press + button. That will be directed you to the register a new device page. You need to fill out all required forms to create a new device. After you finish, you can press continue.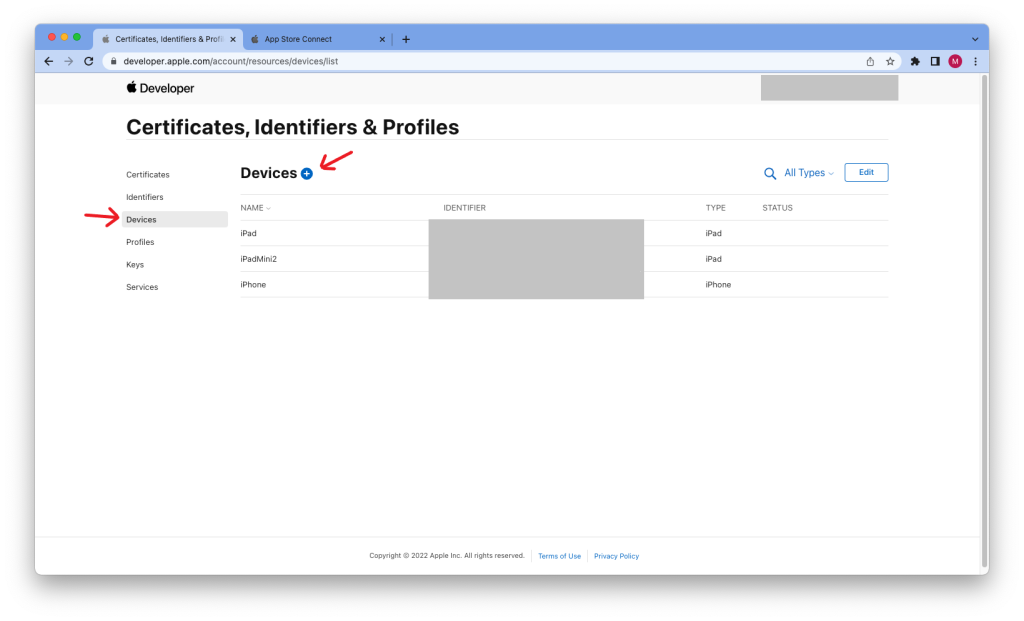
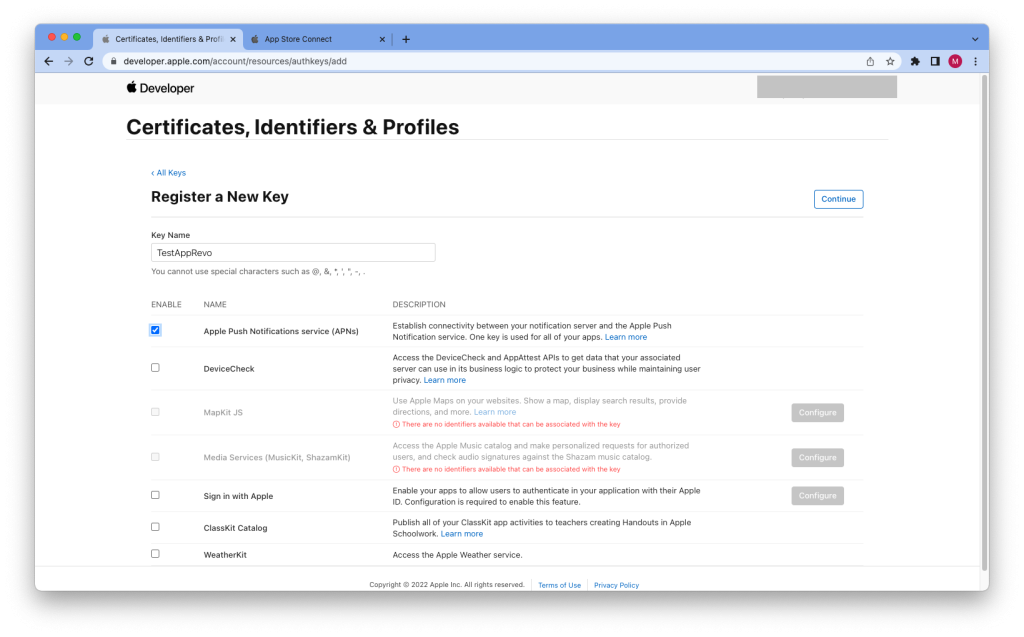
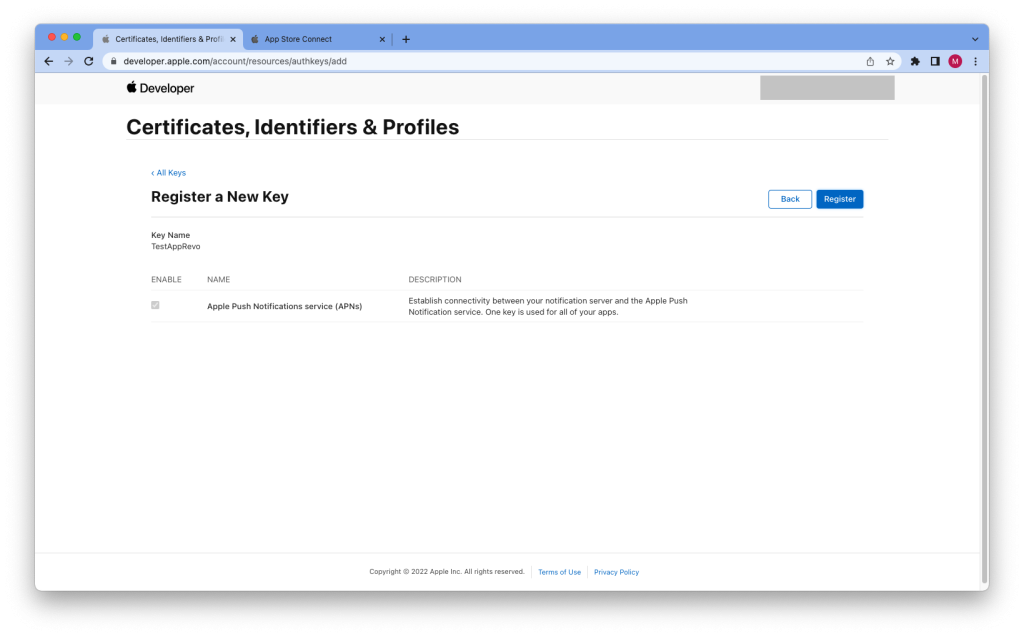
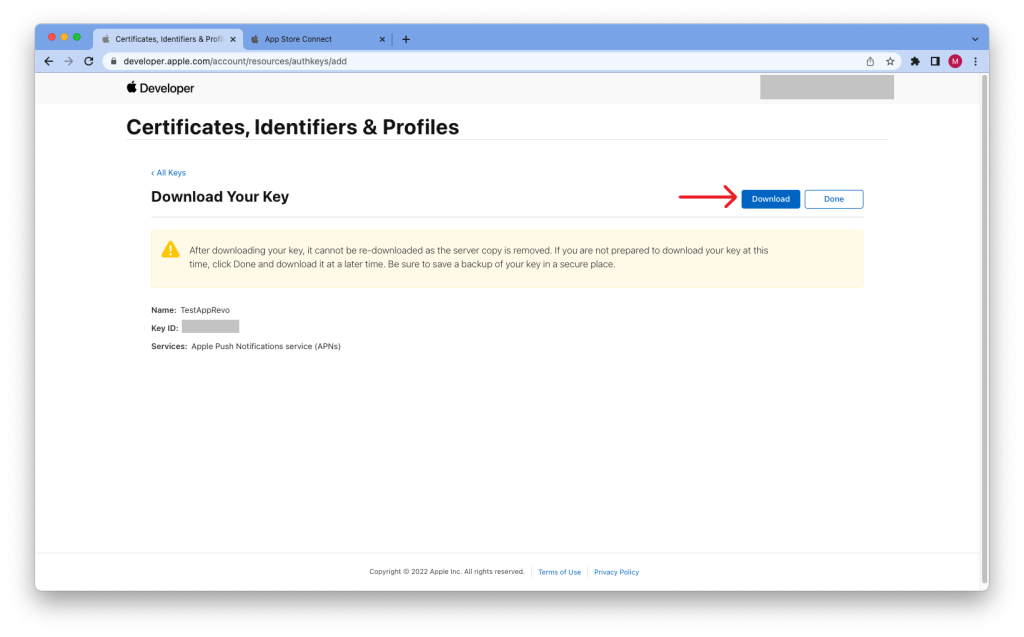
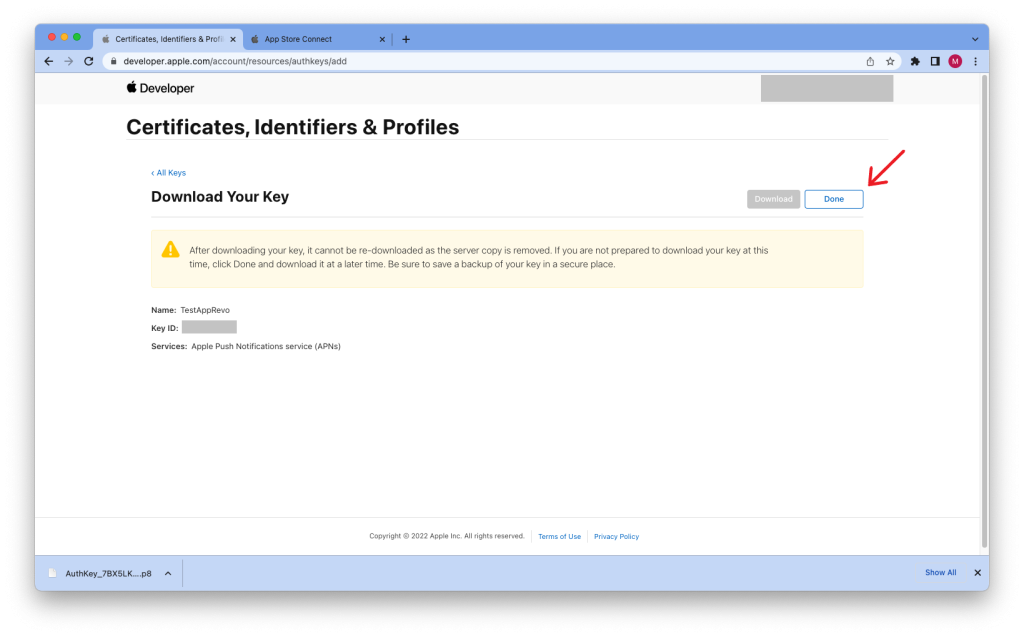
After you create a new device, you can create new keys for push notification. You can open the page from the Keys menu at the Certificates, Identifiers & Profile page. After you open the page, you need to fill key name with your application name and checked the Apple Push Notifications service (APNs). After that, you can continue and it will direct you to the other page. On this page, you need to press register to register your key. After registering, you need to download the file and wait for the file to finish, then press done.
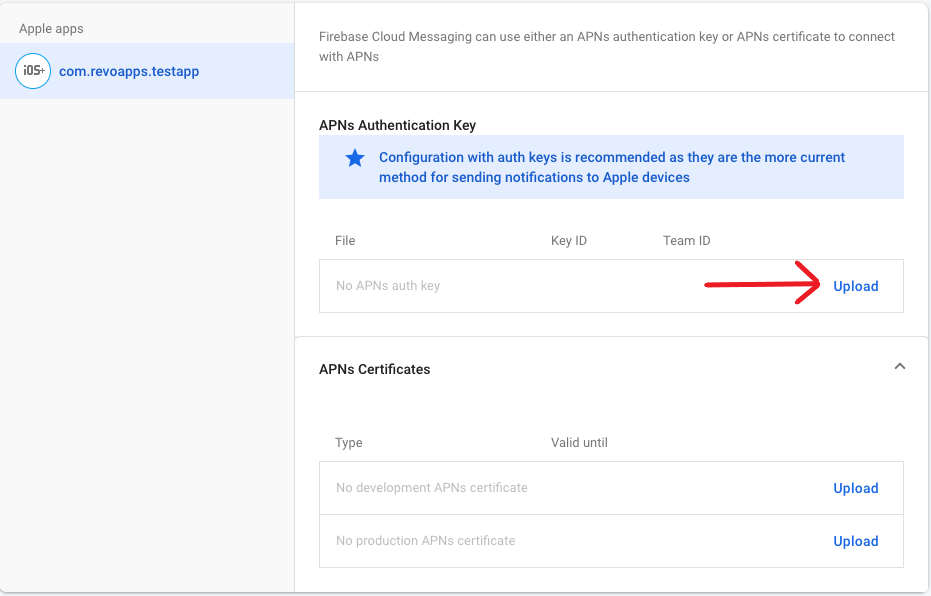
After that, you need to go to Firebase, and choose your ios apps. Then select cloud messaging and scroll down until you see APNs Authentication Key. You need to upload the last downloaded file into firebase.
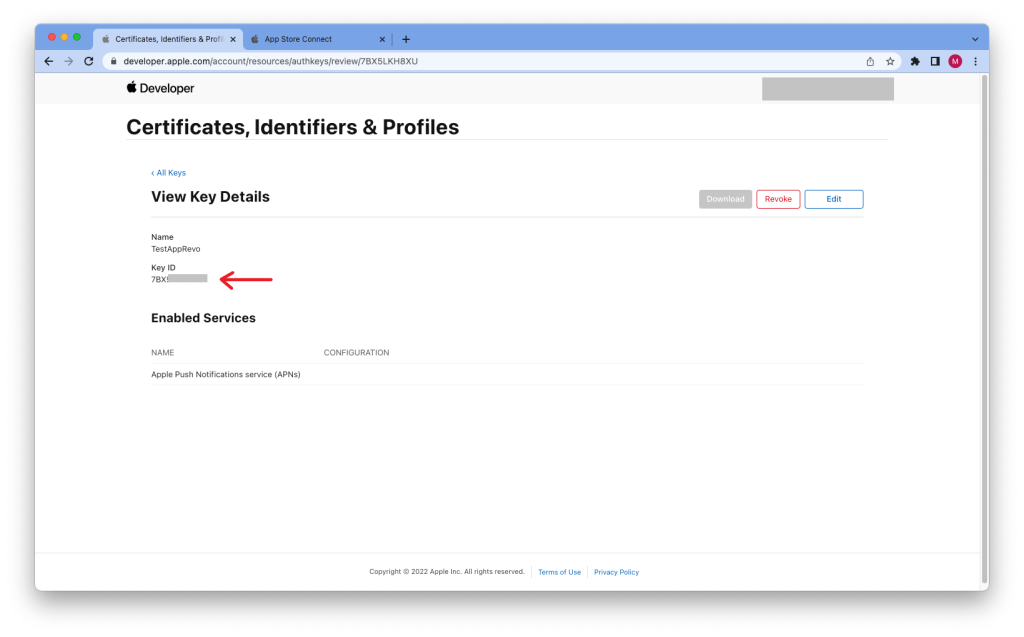
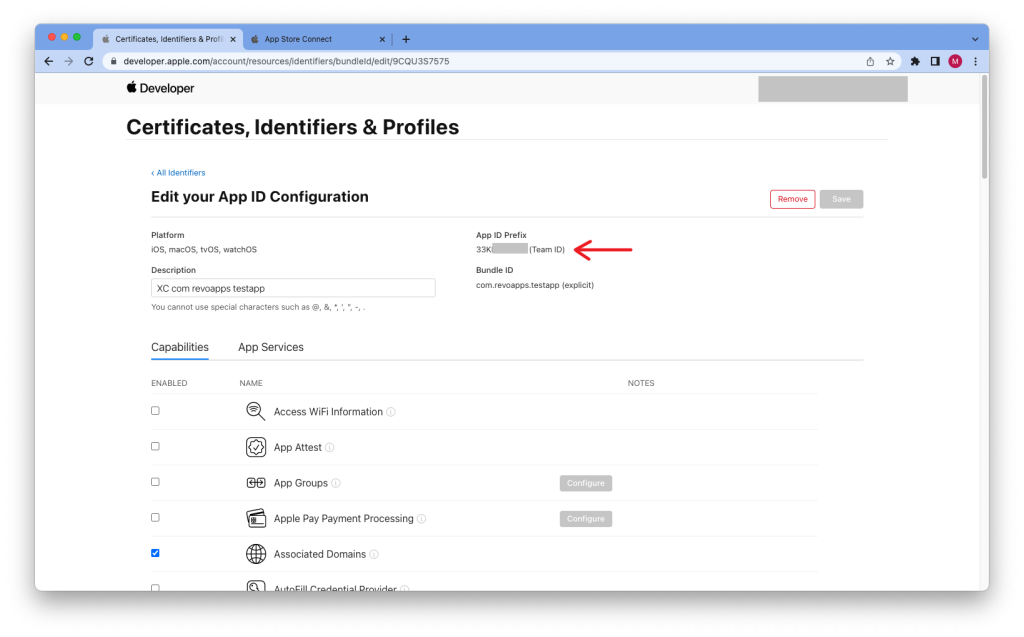
That will need Key ID and team ID. You can get Key ID at Keys before (Certificate, Identifiers & Profile). Team ID from the Identifier section.
Key ID
Team ID
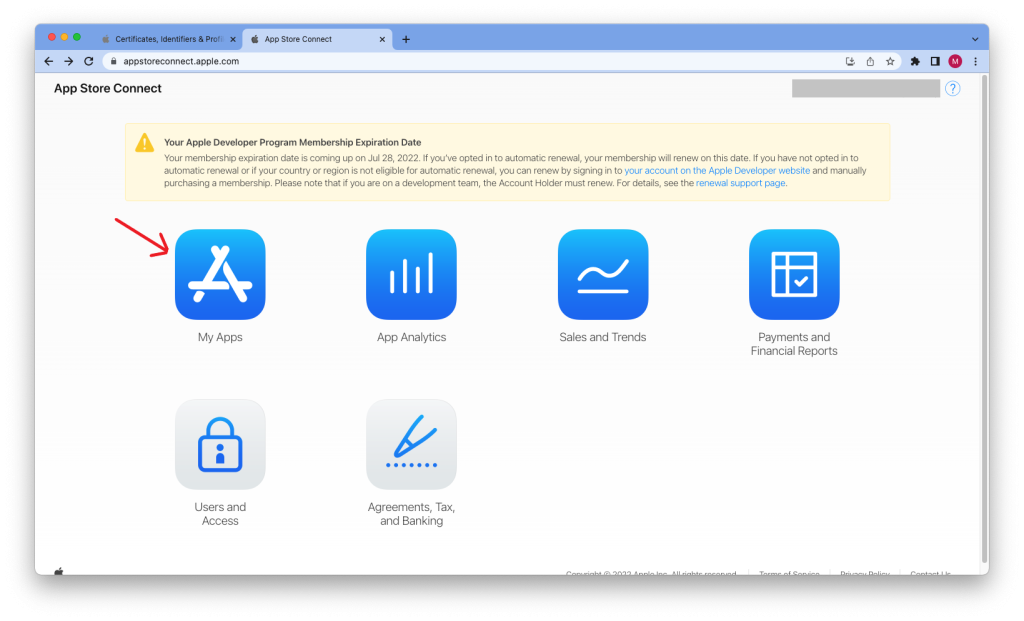
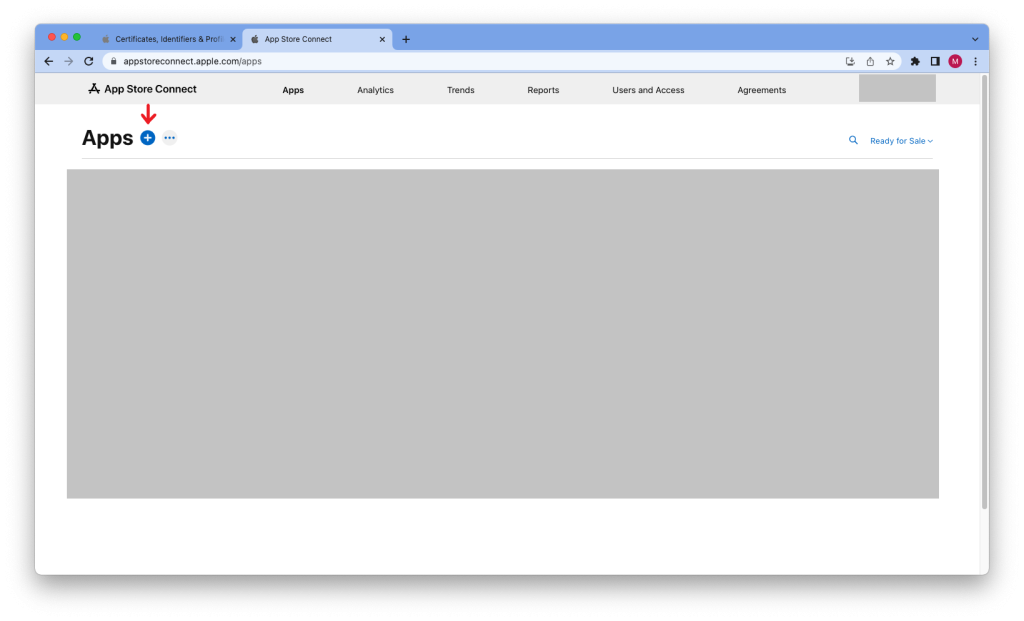
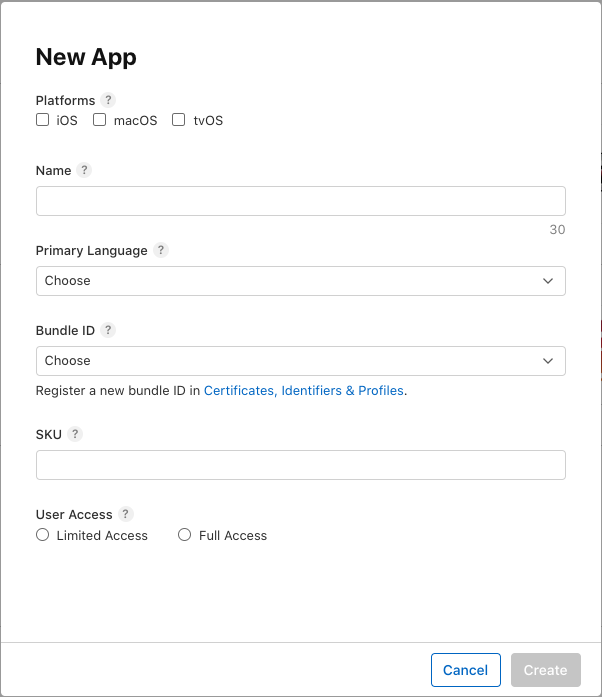
After that, you can go to app store connect and choose My Apps. That will direct you to Apps page. You create new apps with press the plus button and it will pop up new form need to fill out.
Choose iOS for platforms. Fill out your apps name to name form name. Select your primary language. Select the bundle id that has been created in XCode. Fill SKU form with your app name too. Last is select Full Access for user access and create the app. After you create it, the page will direct you to your application page.
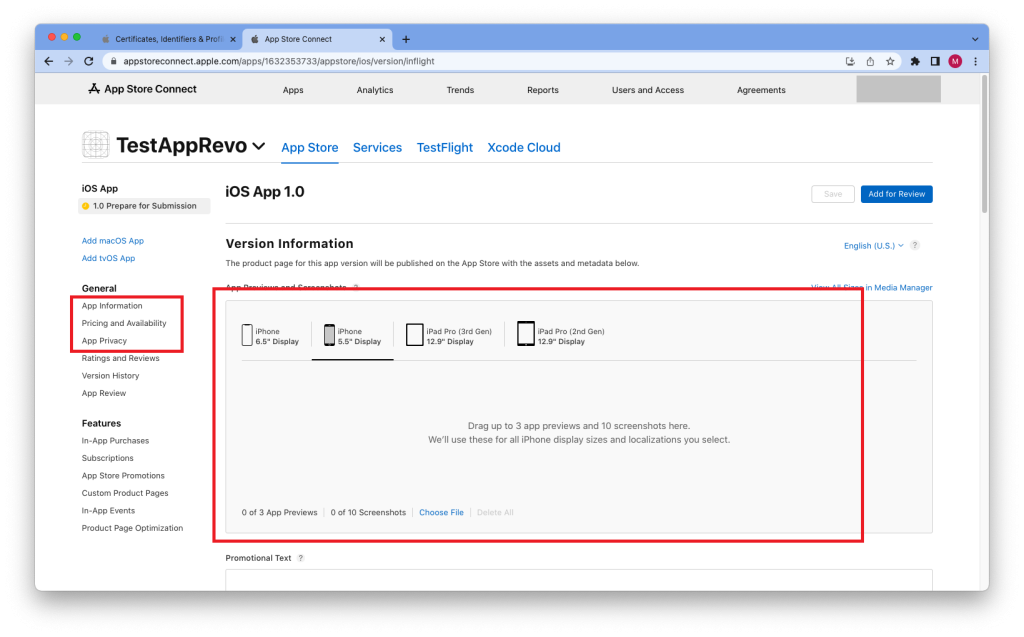
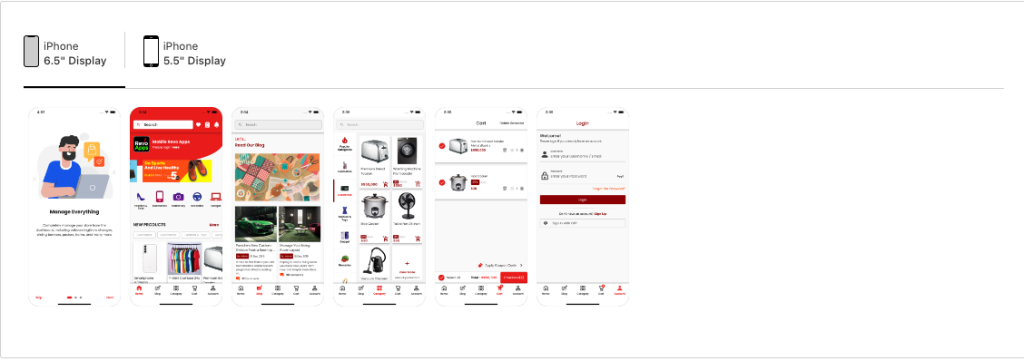
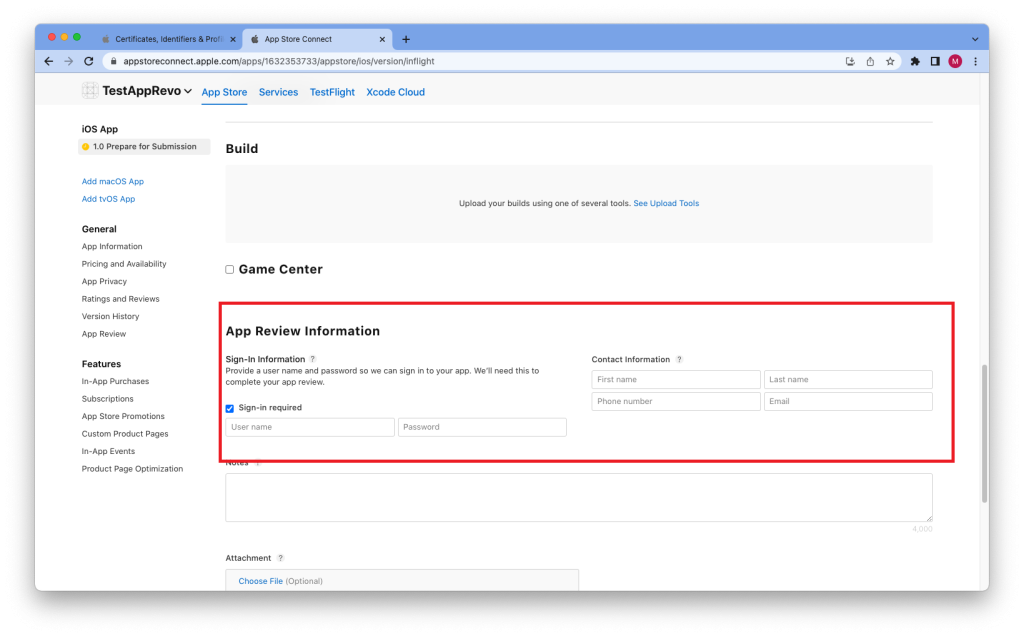
You only need to answer and fill in what’s in the box. For the big one, you need to screenshot your application in the display size that they want. For example:
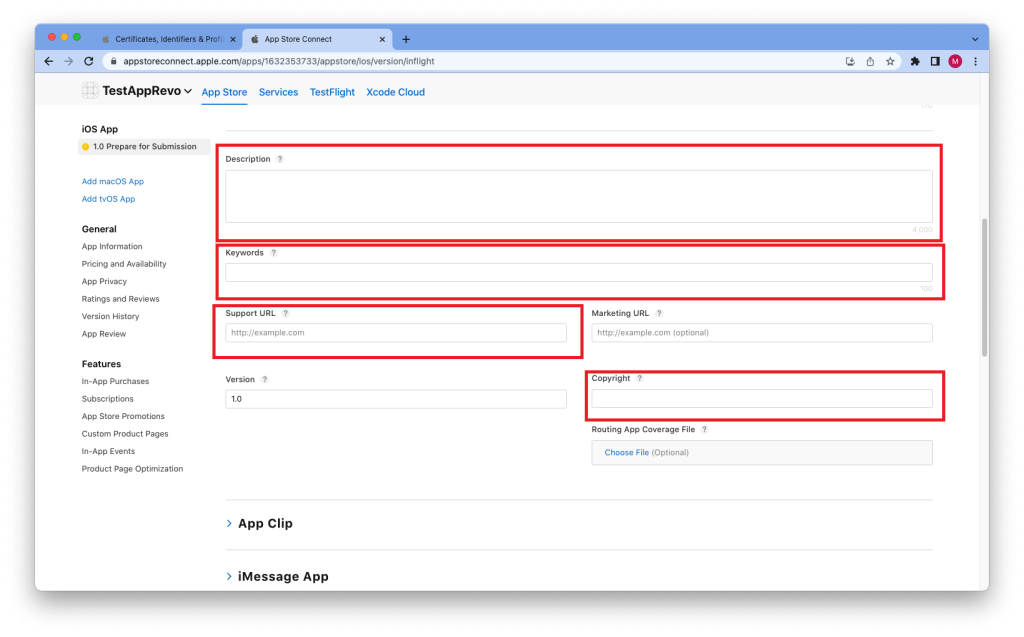
After that, scroll down and you need to fill it all. After you fill out all forms, you can save them. Or you can save them before you fill them all.
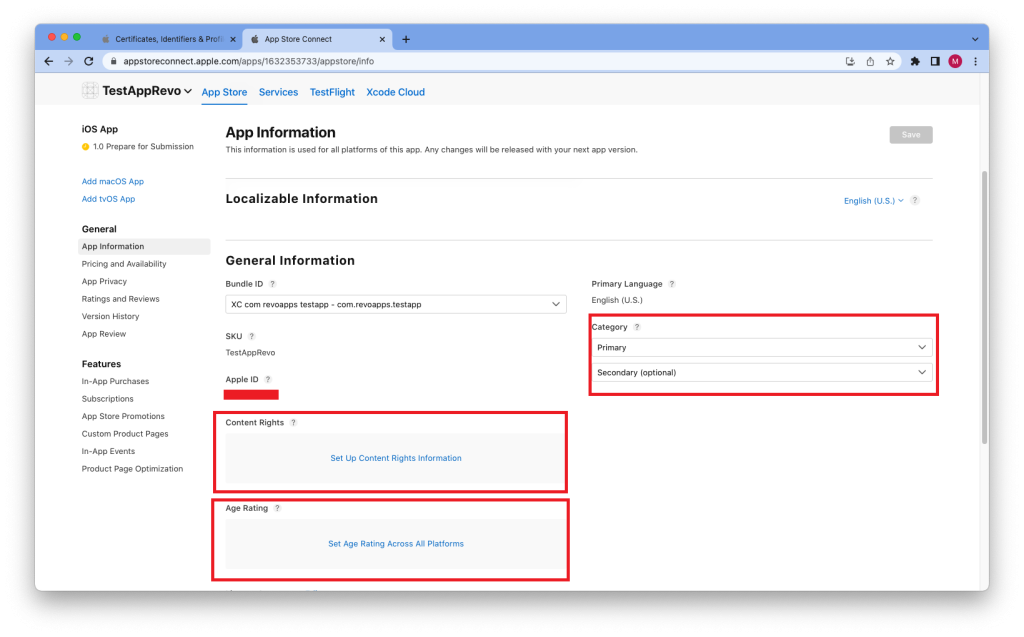
Next, you can go to App Information at the side menu on the left. You need to answer all the questions. And don’t forget to save it.
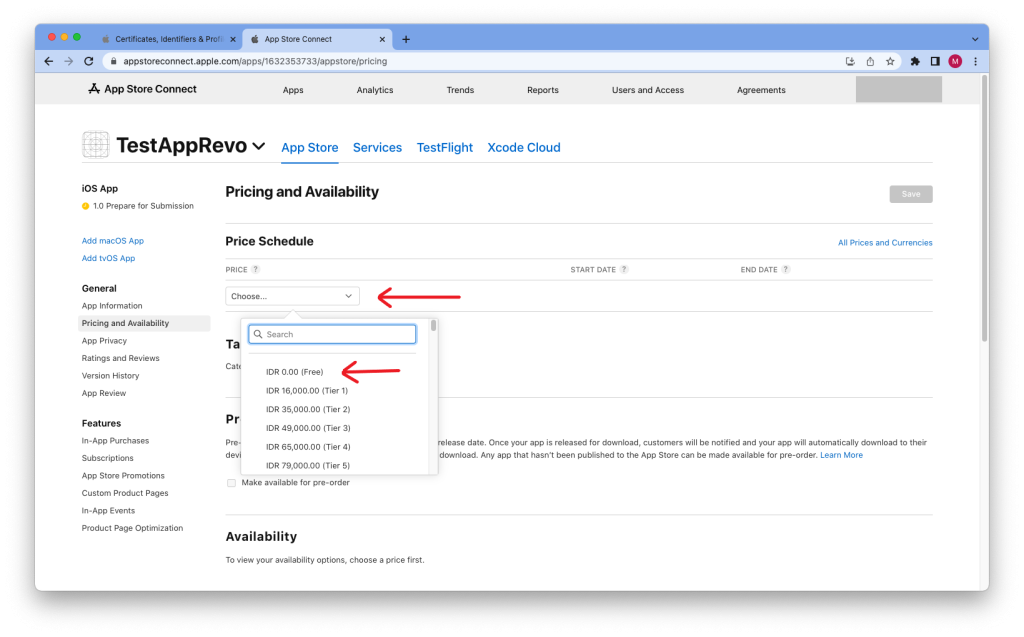
Next is Pricing and Availability. You can select free apps ($0.00 free) like in the picture. Don’t forget to save it.
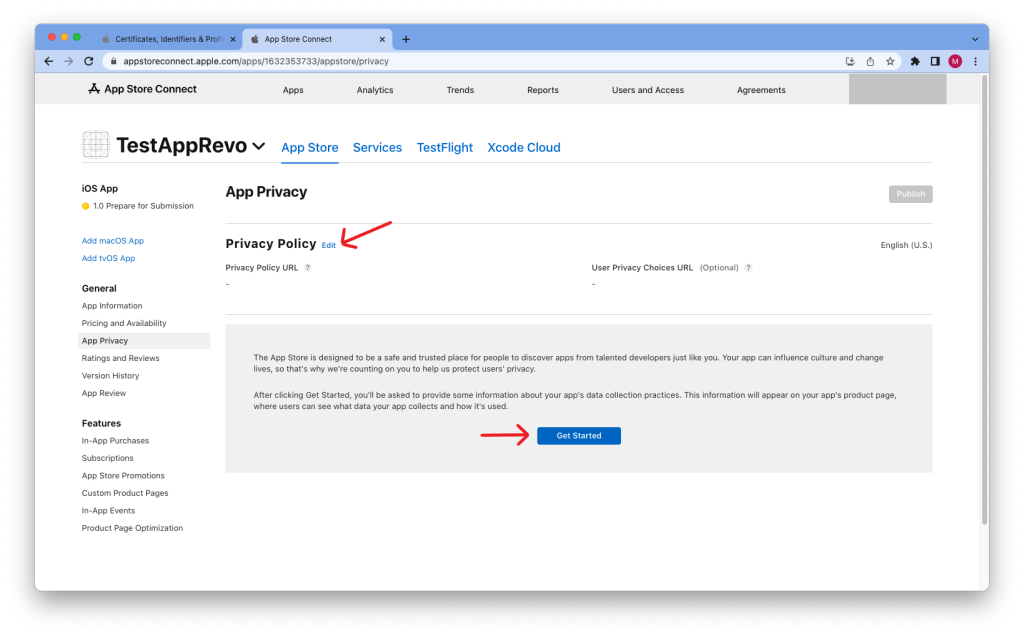
Next is App Privacy. In app privacy, you can edit the url to insert your privacy policy url. After that, you can press Get Started and answer all the questions.
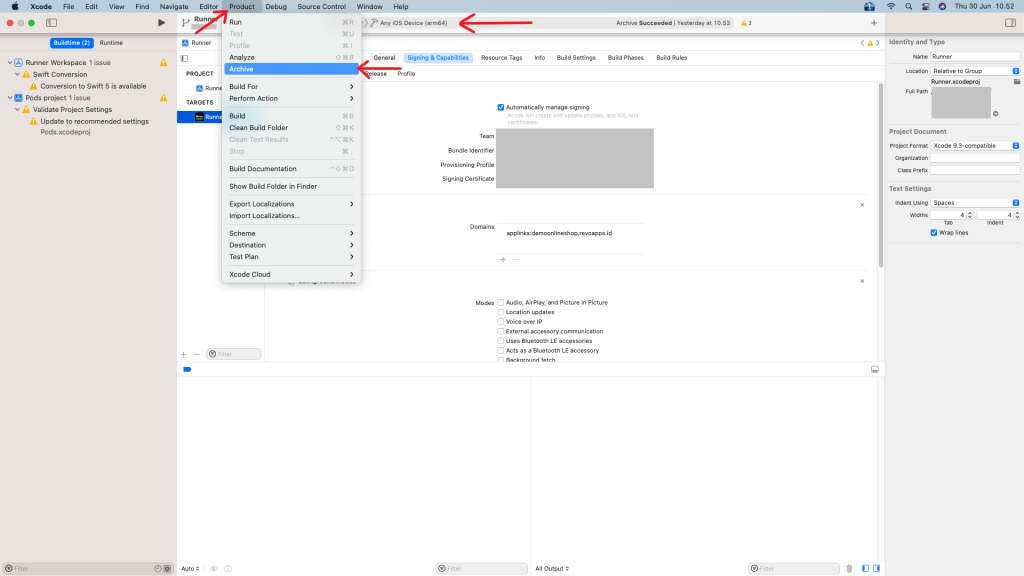
After you fill out all forms and answer all the questions, you can back to the XCode program. You need to archive the code. Before you archive don’t forget to change the device to Any iOS Device on the top. After you change the device, you can archive the code. The archive menu is on the Product menu at the top.
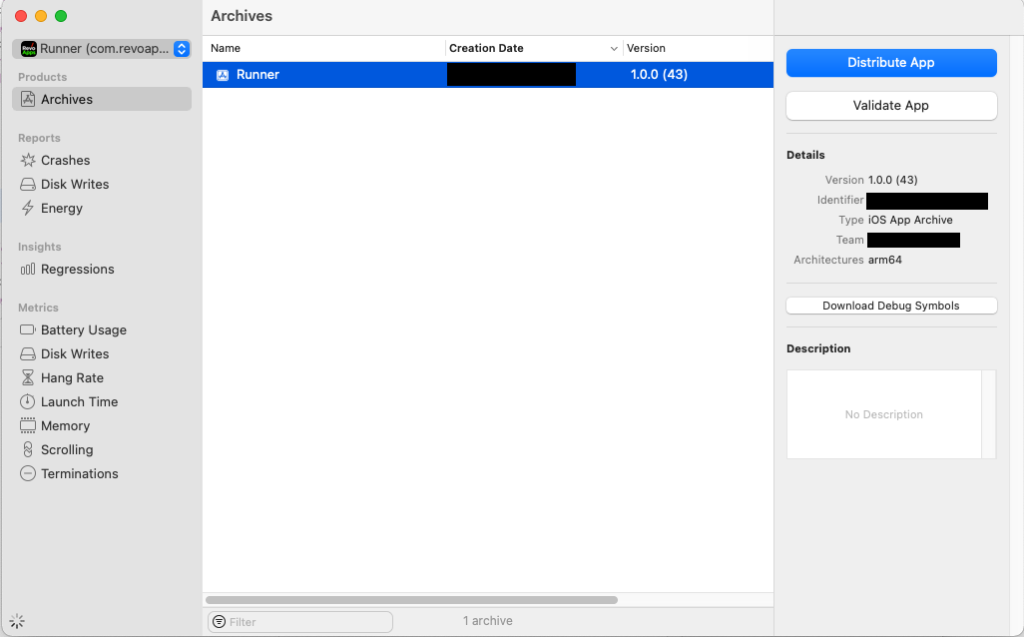
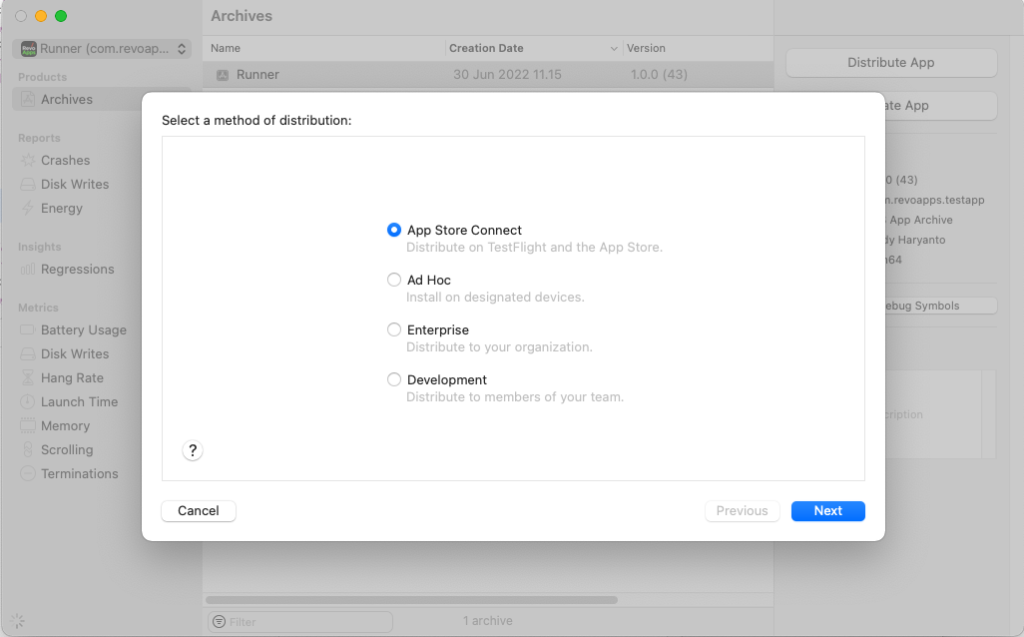
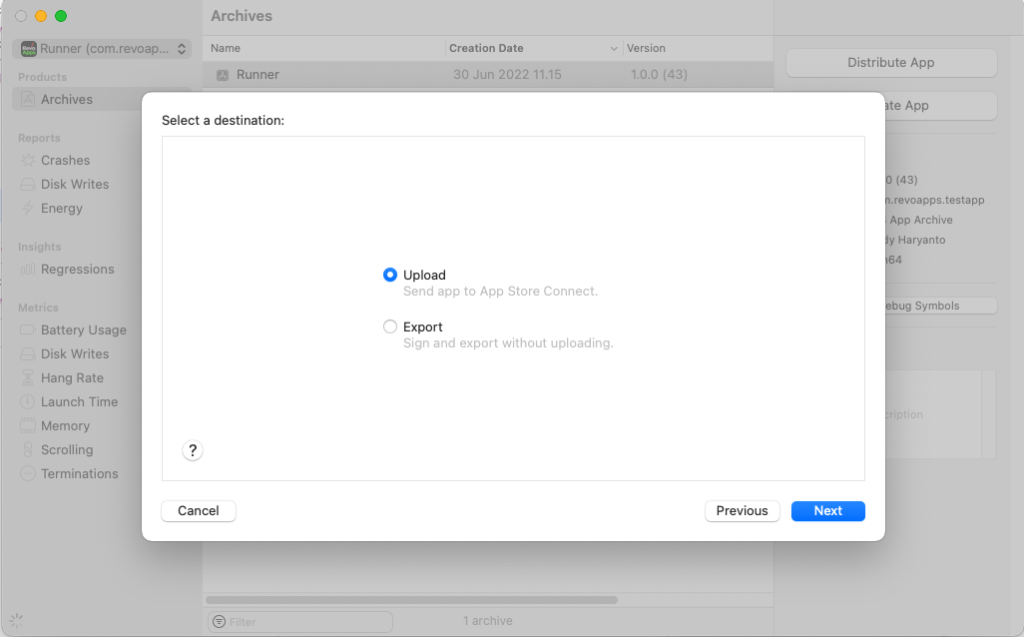
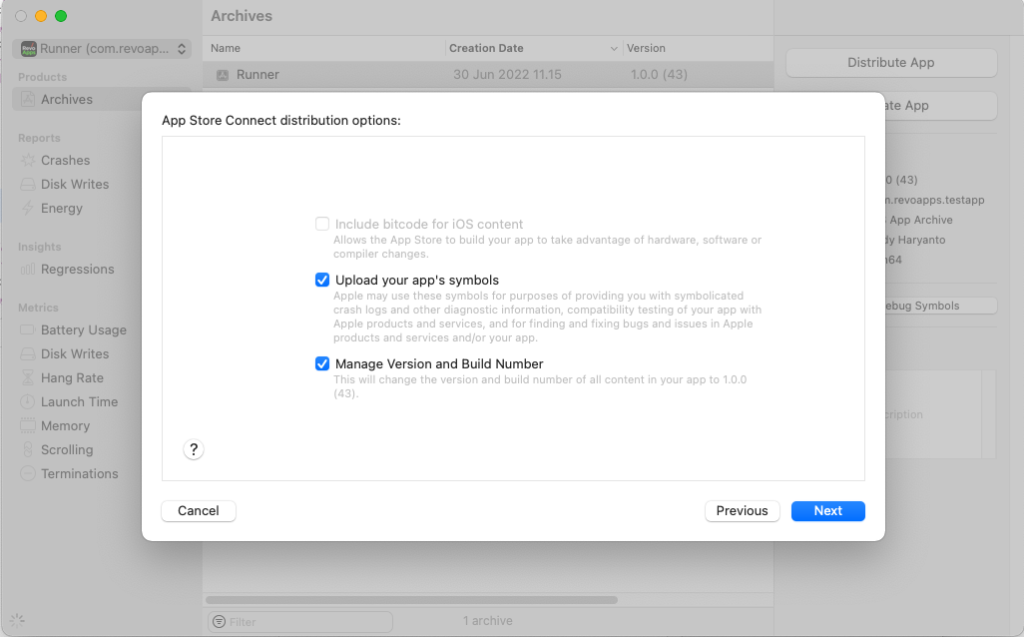
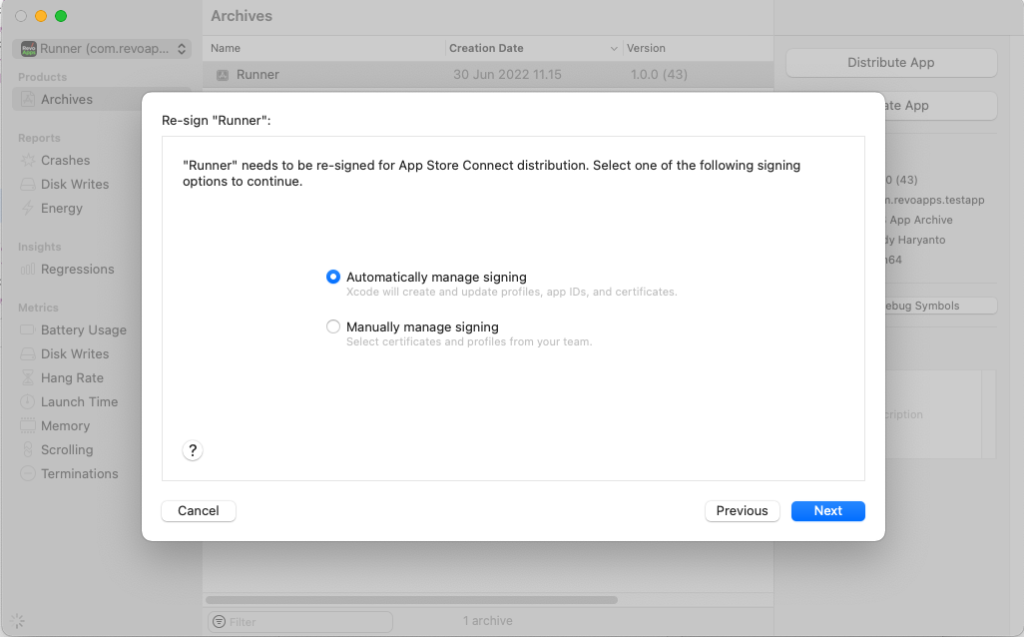
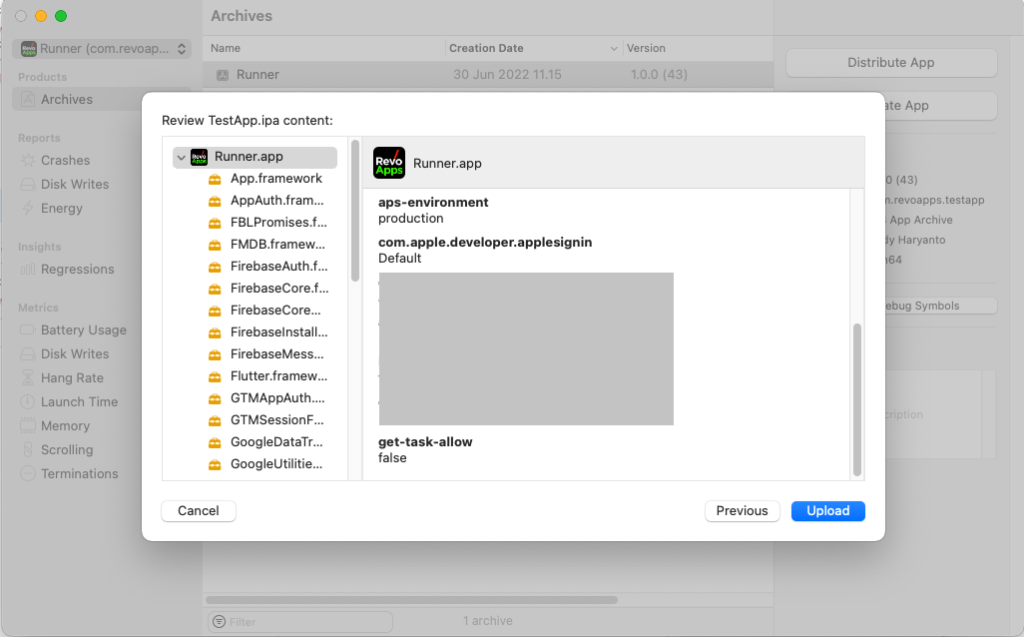
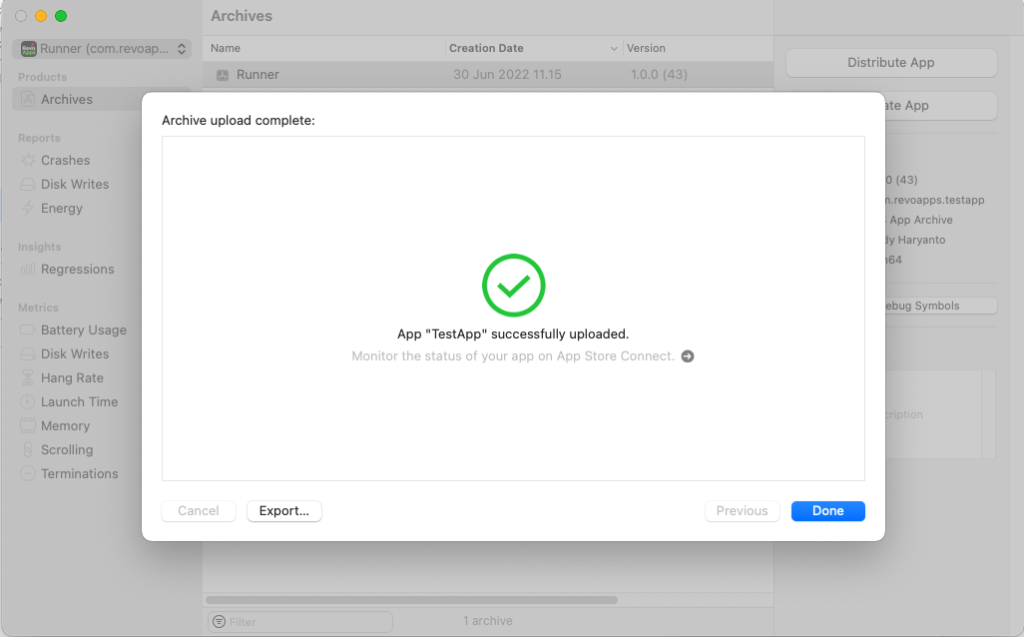
This step will take a lot of time, after this step is done, it will pop up a new window to upload to App Store. You need to select an archive to distribute app. After you press distribute app, a new window will pop and you can just press next until upload.
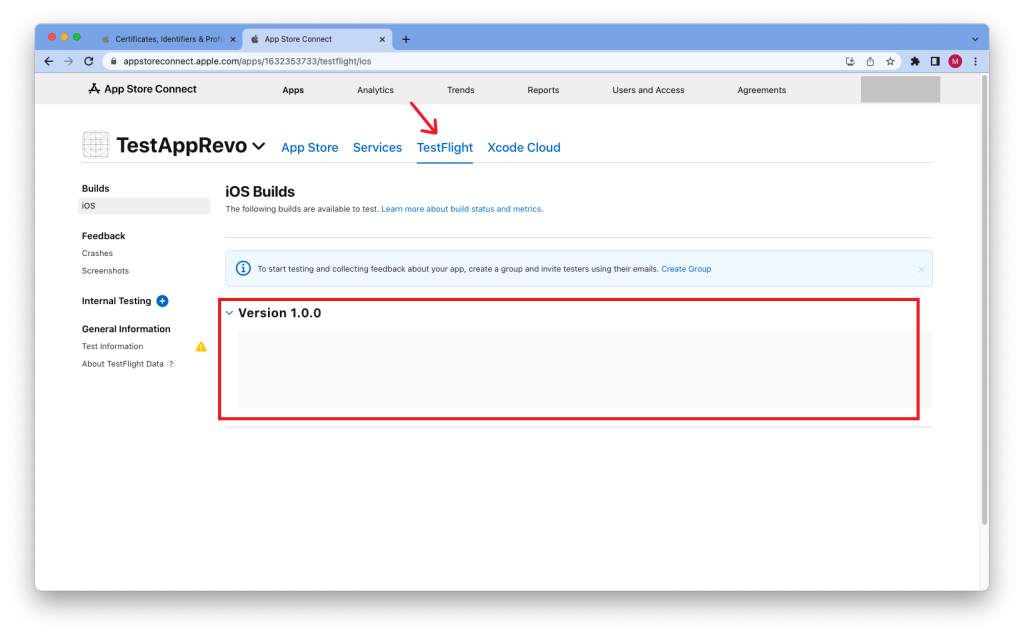
After you press done, the window will close. Now you can open the app store again. In the app store you need to open the TestFlight page to see the build uploaded before.
Wait for the build uploaded and it will appear in the red box. You can refresh the page every 5 minutes.
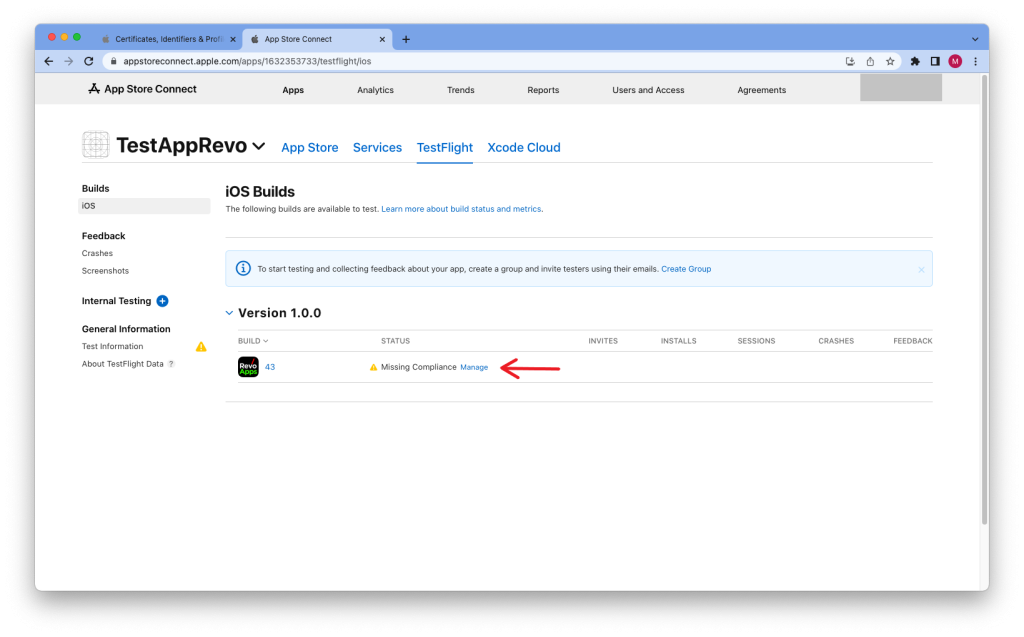
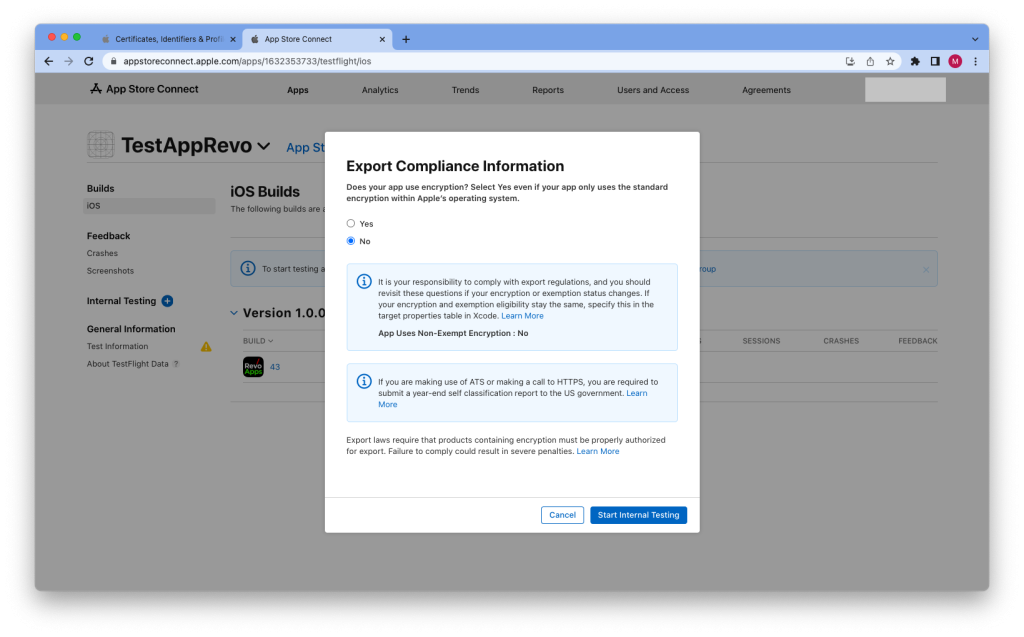
After the build is uploaded, it will appear like that picture and you need to press manage. It will pop up a new window to select an option, just select “No” and press Start Internal Testing.
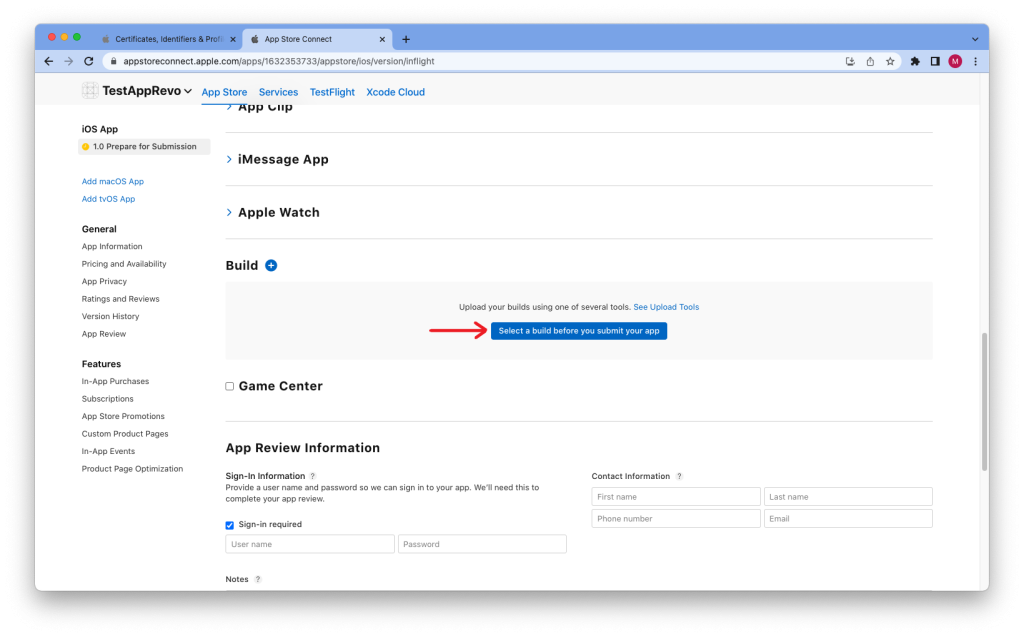
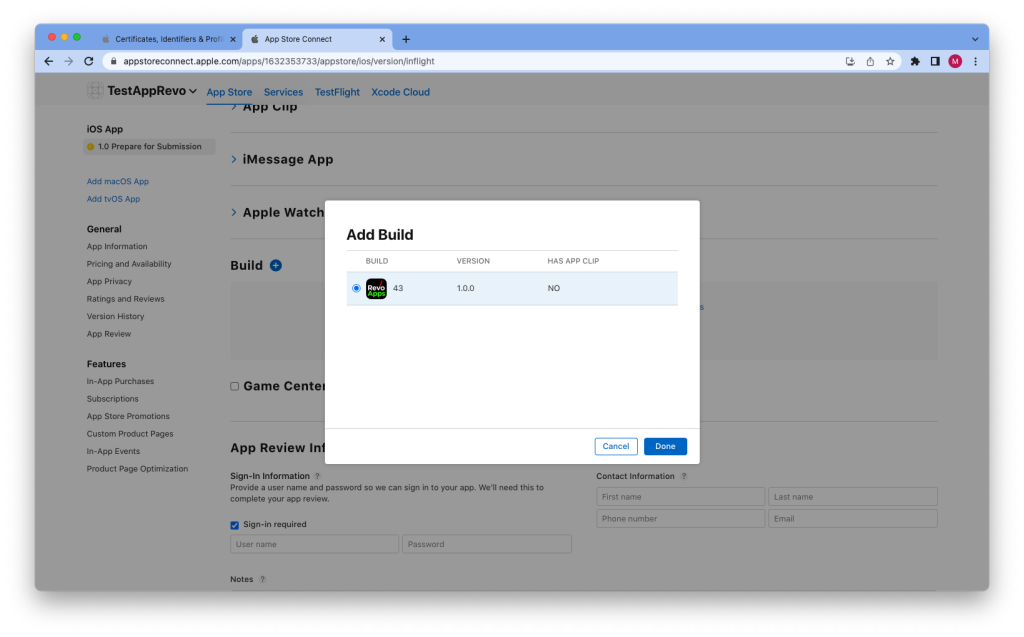
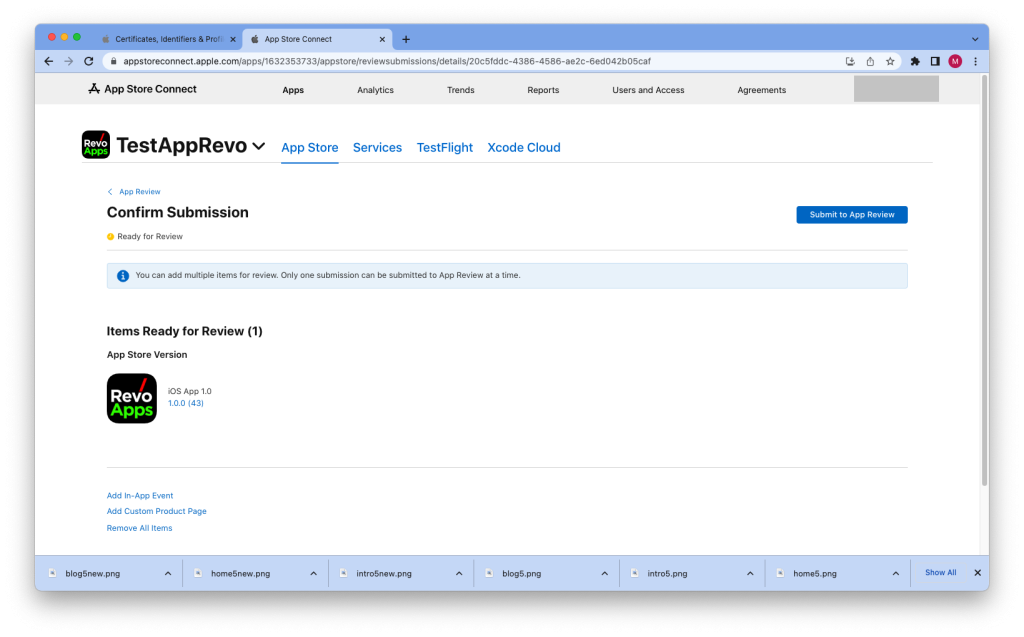
After that, back to App Store again, and scroll down into build. You have to select a build before you submit your app. Press it and the build option will appear. After that, you can select it and then submit it to the App release.
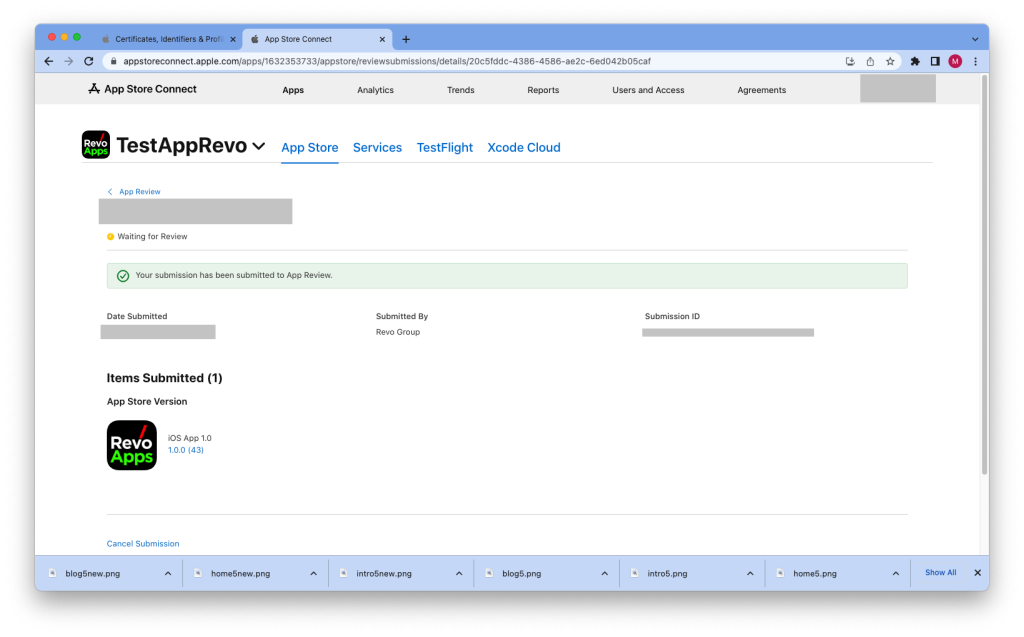
After you submit, the build of your application is ready to review by the apple team. Thank you
